Content Management System
Website builder software and Content Management System. These two definitions can often be confused. They also overlap each other: a CMS can be a website builder software, and a website builder software can be used to manage the contents of a website.
Our CMS is not a website builder software. This particularity can be used on existing websites. Yes, you can use it with an existing website even if it doesn't have a database or a complex system. We can apply this CMS to your HTML website as well.
Our content management system is based on a simple principle: creating some editable areas in the web page without changing the structure of the website.
This will extremely simplify the system resulting in a very easy way to use.
Of course, there will be some limitations compared to a full CMS, but usually, most of the features are never used.
It will be possible to increase the number of features on request.
No, no price change on improving the possibility of using our content management system. We keep this step-by-step approach to serve an easy product to the user that will not be distracted by useless complicated functions not related to him.
Content Management System Guide
So down here you will find the full guide of the CMS. If you need some features that are not active in your actual CMS, just send us a note and we will activate them (where possible) for you.
If you want to know the price, just scroll down to the CMS pricing section.
How to use the content management system
This webpage will help you edit your website using the Content Management System. A content management system, or CMS (pronounced C-M-S), is any software that gives you the ability to update content on your website.
Note that this is a limited guide; for a full guide, you can download the full CMS guide of our system.
Let's start using the CMS
To access the CMS, you will need a web browser and an Internet connection.
To access the CMS, navigate to the following website in your browser:
edit.hosting-international.com and you will see this:
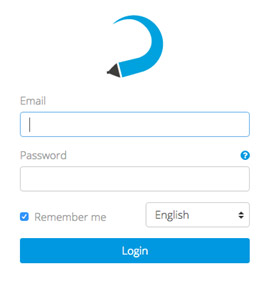 or
or 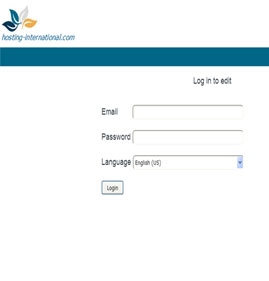
Resetting Your Password
If you forget your password, you can reset it by selecting the round question mark link from the login page:
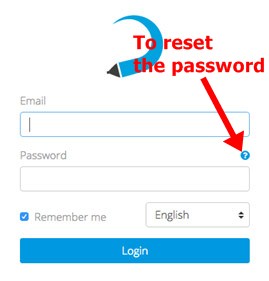
The Reset Password page will appear:
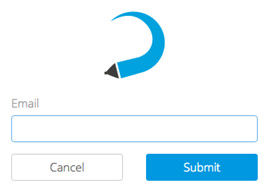
Enter your email address and further instructions will be sent to you. If you don’t receive an email after a few minutes, please check your junk or spam folder.
Sites
The first page you will see when you log in will be the Sites page. Since the CMS is capable of managing multiple websites, your list will contain all of the sites you have access to. At any time, you can select the Sites tab to come back to this list.
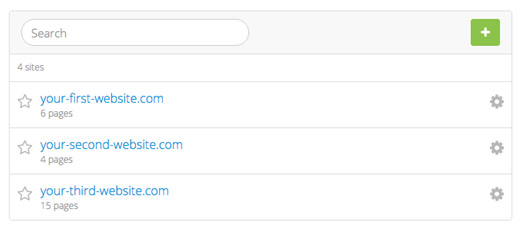
To edit a site, select it from the list. This will take you to the Pages page, where a list of pages you can edit will be shown.
Pages
To edit a page, select its label from the list.
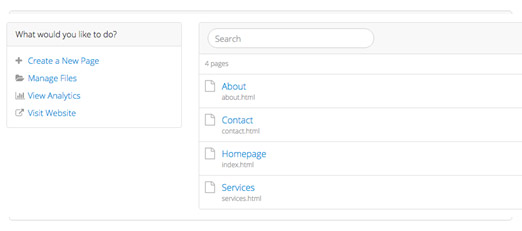
The sidebar on the left may have different options depending on your site setup. If you don’t see an option mentioned here, it has not been enabled for your site.
Editing
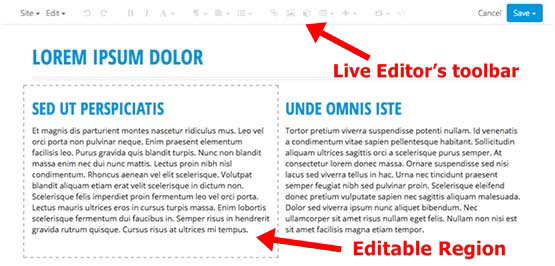
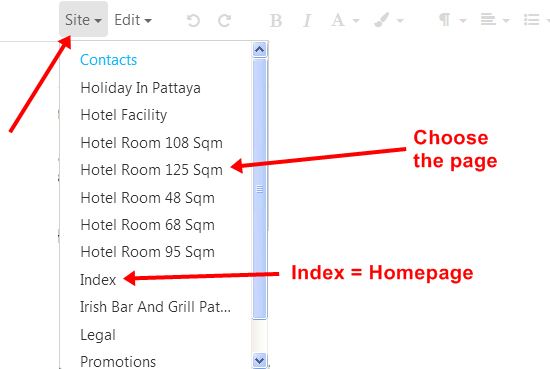
Once you’ve selected a page to edit, you will be taken to the Live Editor. The Live Editor is a special version of your page that lets you edit content and shows how changes will look like once they’re published. By design, you will not be able to follow links or navigate away from the page while editing your site in the Live Editor. To change pages, click the Site button and choose the new page (see the second image).
To change the page:
Editable Regions are sections of the page that have been enabled for editing by your designer. They are indicated by dashed outlines that appear when you hover over them.
To edit a region, simply place your cursor anywhere inside an editable region. Depending on the region, various features will be made available in the Live Editor’s toolbar.
Description of the Live Editor’s toolbar
The Paragraph menu lets you format entire blocks of text into headings, paragraphs, block quotes, or pre-formatted text.
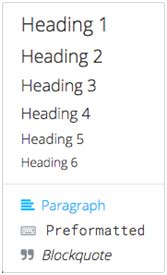
To create a heading, place your cursor inside an Editable Region and select
To remove a block format, place your cursor in the desired block and select Paragraph from the Paragraph menu.
To apply the text formatting such as bold, italic, and underline to text, highlight the desired text and select
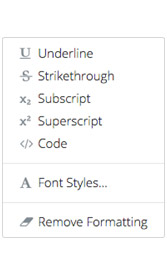
If your CMS has enabled Font Styles, you can use this option to change the font, size, color, and background color of text.
Similarly, you can use Custom Styles to select from a list of predefined styles (only if the webmaster did prepare for you).
Note: On websites, underlining text is typically reserved for hyperlinks and may be considered bad usability. When you need to emphasize text, consider using bold or italic instead.
Links
To insert a link to another page or file, highlight the desired text and select the Link button.
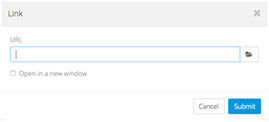
Enter a URL or browse for a file on your server. If you’d like the link to open in a new window, check the Open in a new window box. When you’re finished, select Insert to create the link.
To edit an existing link, place your cursor on it and select Insert > Link.
Images
To insert an image, place your cursor inside an Editable Region and select the Image button.
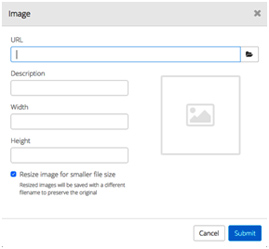
Enter a URL or browse for a file on your server. After a URL has been entered, a preview of your image will appear on the right side of the dialog.
Providing a Description is recommended, as this will aide users who have images disabled, users with text-based browsers, and users with disabilities that prevent them from seeing images.
Once you’ve entered a URL and a description, select Submit to insert the image into your page. To edit an existing image, place your cursor on it and select the Image button or double-click on it. If desired, you can crop an image by dragging a selection over the preview in the Image dialog. When an image is cropped, the original file is left intact and a new one is created.
By default, images will be physically resized when a smaller width or height is entered. This optimizes them so they load faster, but the option can be disabled by unchecking the Resize image for smaller file size box.
Embedding Content
To embed content from a third-party provider such as YouTube, Vimeo, Twitter, Google Maps, etc., place your cursor inside an Editable Region and select the Embed button.
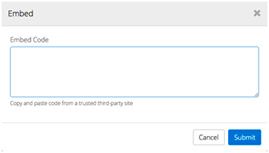
Paste the embed code into the box and select Submit. The media will be embedded into the editor.
To edit an embedded object, place your cursor on it and select the Embed button again, or simply double-click on the object.
Anchors
Anchors let you deep-link into a specific section of your page. To create an anchor, place your cursor in front of the heading you want to link to, go to
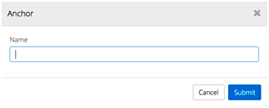
Enter a name for your anchor. Since anchors must follow a special naming convention, the CMS will automatically convert the value you enter into a compatible name (all small caps, all attached or with hyphens: - , no special characters).
Anchors are normally not visible on webpages, so once an anchor has been inserted into your page it will appear as a
Inserting Tables
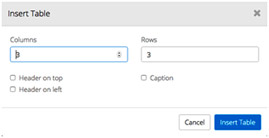
To insert a table into your page, place your cursor inside an Editable Region, go to
Please note: we strongly discourage the use of tables. Tables are not very responsive-friendly and in some cases are considered deprecated. Please consult with us at info@webdee-seoservice.com.
Anyway... Enter the number of columns and rows for your new table.
If you want your table to have a header that spans across the first row of your table, check the Header on top box. If you want your table to have a header that spans across the first column of your table, check the Header on left box. To add a caption to your table, check the Caption box.
Once you’ve configured the table options, select Insert Table to insert the table into your page.
You can edit existing tables using the Table menu. To open it, go again to
Repeatable Regions
Your website may be configured with Repeatable Regions on one or more of your pages. These are blocks to be quickly reproduced while keeping the structure intact. They allow you to add, remove, and reorder blocks of content.
Repeatable Regions are indicated by a thin, dashed border.
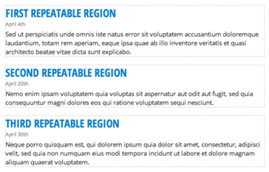
When your cursor is inside a Repeatable Region, the following button
Editing Page Properties
Page Properties include the Title, Description, and Keywords that are used to tell search engines information about each page. If your website has this feature enabled, you can change these values for each of your pages by going to Edit > Edit Page Properties. This will bring up the Edit Page Properties dialog.
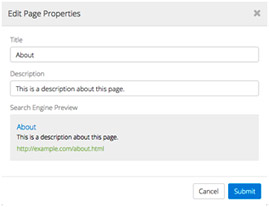
Title: This is usually the first thing people see when viewing your site in a search engine, so make it interesting but not too long.
Description: This typically appears under the Title in a search engine’s results. Keep them short but relevant. Remember that you are limited to a varying number of characters depending on the search engine a potential visitor may be using.
Keywords: Nowadays keywords are ignored by Google. But in the world, there is not only Google.
Search Engine Preview: This will show you what your page will look like in most major search engines. The maximum lengths for titles and descriptions will vary, but this will give you a good idea of how potential visitors will see your page when browsing a list of search results.
Publishing Pages
When you’re finished editing a page, you’ll need to publish your changes before they appear on the live version of your website. To publish a page, go to
If you want to save your changes but don’t want to publish them to the live site yet, you can save a Draft. To save a draft, go to
Every time a page is saved in the CMS, a Revision is created. You can view all the revisions of a page by going to Edit > View Revisions. This will bring up the View Revisions dialog box.
To open a revision for editing, simply select it from the list.
You can also delete revisions you no longer need. Just remember that once a revision is deleted, there’s absolutely no way to get it back!
Settings
Updating Your Personal Info: you can manage your account settings by selecting Settings from the main menu.
To make changes, simply update your name, email and/or language and select Update. You can also change your password by selecting the Change button on the right side of the page.
Note: Your language preference will be saved in a cookie on your computer, so if you use another computer or clear your cookies, you will need to set it again.
Help
The Help section is designed to expedite help requests. To submit a help request, select Help from the main menu.
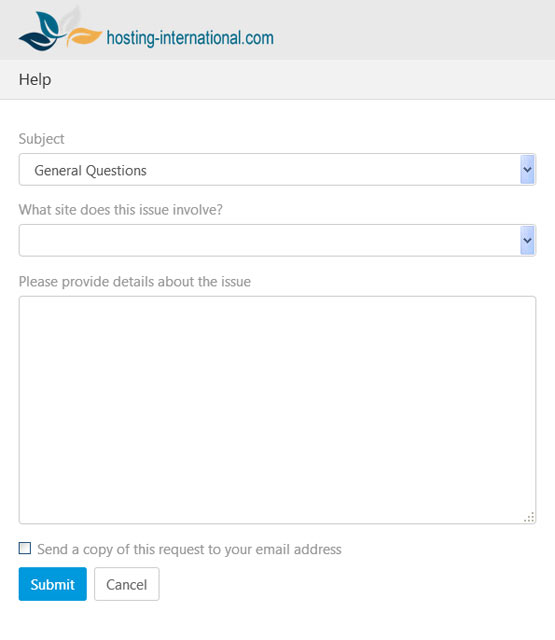
When submitting a request, please select the appropriate reason for the request and the affected site. Remember to provide as much information as possible to help troubleshoot your problem. If necessary, include details such as your operating system (e.g. Windows or Mac), your browser, browser version, and any steps we should take to reproduce the problem. If you’d like to receive a copy of your request via email, check the Send a copy of this request to your email box.
In most cases you will receive an answer via email. Feel free then to write back by replying directly from your email client without using the form again.
In any case you can rely on the main email: info@webdee-seoservice.com
CMS Pricing
If you already have a site with us, you already know the price.
If in the agreement you had with us you did not ask for or did not want the CMS and now you would like to use it, the price is 3,500 THB per year.
If you have your own website and you want to apply our content management system, we should check your website. Prices can vary depending on the kind of website and the pages affected. Let's say that for a 10-page website in HTML, the first-year cost will be 5,500 THB and the renewal price will be 3,500 THB.
Please note that this price includes general updating support. This means you can simply send us the content via email, and we will update your website for you. It's very easy!
Home
🛍 Products
฿ Pricing
Fast Websites
Fast E-commerce
SEO Website
Real Estate Website
Small E-commerce
Contacts
About Us
Small Website
E-commerce in Your Site
🛒 Professional E-commerce
Professional SEO E-commerce
2 Languages Website
⚡AMP HTML Website
E-commerce Article
WordPress
Quotation and Order
High Traffic Website
CMS Update Your Website
Domains & Hosting
How We Make the Website
📰 Mobile Website Article
Types of Websites
Social & Marketing
Web Design
🤔 Do it Yourself
All web services
Go up ↑
